Friday, 22 May 2015
Finished! YAY
I have finally finished my animation and it looks great, so happy with it. :D https://vimeo.com/128576739

Finalising in after effects
I have decided to add zooms and camera shakes in relation to the music in after effects using a wiggle control, I thought this adds a nice dynamic feel to the animation and makes it feel more real.
Animating the Fly
I am animating the fly by importing the specific shots that involve the fly as video files into photo shop creating a new blank video layer and drawing over the top of my video frame by frame in relation to the movements of my puppet, these two layers where then attached in after effects, so that I could apply movments and zooms to the camera without having to animate both the fly layer and the puppet layer.
Syncing the Animation
I have gone onto realize that due to all my images being essentially stacked ontop of eachother that small counting errors towards the start of the animation can seriously affect the rest, I have now gone over all of my x sheet and re synced all of the frames.
Shooting the Animation
Due to certain circumstances in my life I haven't been able to start shooting as early as I had hoped, leaving me hardly enough time to be fully animate the piece. I officialy started shooting 2 months before my deadline at the start of the easter half term, I had to come in every single day for at least 5 hours of the half term and the two weeks after to get the full 1000 frames of my animation fully captured, this was a very intence time for me shooting around 50 frames a day averaging around 6 minutes per photo, towards the end when I seriously needed to have it done I did one 8 hour day where I shot 300 frames averaging around 2 minutes per photo, I really wish I hadn't done this as it does show up in the animation, the joint between jaw and face slowly looks worse and worse, oh well.
Actually shooting the animation was fairly easy and extremely fun. It was also extremely rewarding to see it slowly coming to life I am at a point now where I have the RAW animation as one final image sequence synced to the soundtrack, I now need to add in zooms fades and the illustrated fly over the top for the deadline.
Actually shooting the animation was fairly easy and extremely fun. It was also extremely rewarding to see it slowly coming to life I am at a point now where I have the RAW animation as one final image sequence synced to the soundtrack, I now need to add in zooms fades and the illustrated fly over the top for the deadline.
Finished Xsheet
Finally finished the Xsheet, and its time to start animating. I have been taking test shots setting up my camera setting up the lights in the stop motion room in university, in there I have a light rig with studio lights but these are extremely hot and after hours animating in there it can start to melt the plastercene so I also have the air condition on.
Designing the Set
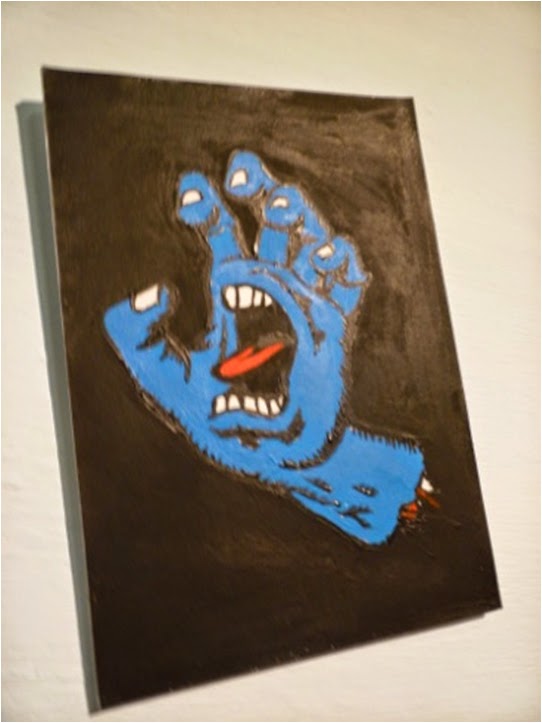
These are some photos from my set that I designed, as the story is based in a bedroom I created a door, a wardrobe and a bed from foam board and added material that bested bed sheets. I also made some hand painted posters, that show where my influences for this video came from.


Writing The Xhseet

It would be nearly impossible to produce my animation to the technical level in which I want it to be animated in without writing an Xsheet. An xsheet or dope sheet is an instructions guide for my self to animate, it is a kind of map where you can write 5 different instructions onto a 12th of a second in relation to the exact noise that is made at that specific frame in the animation. I wrote this by scrubbing across my soundtrack in ToonBoom. My xsheet is the fundamental root for me to start my animation from. I cant start animating until it is totally finished, at the moment I have scrubbed over the entire dialogue and recorded it on the sheet, I then have to act all of this out and add in the movement, eyes and camera cuts.
here is a test of the part of ther xsheet you see above looped https://vimeo.com/128576507
Writing the Storyboard/Animatic
https://vimeo.com/128576131
Friday, 5 December 2014
Dialogue
The dialogue within my video goes as follows:
‘snore’ ‘bzzzzz’ ‘ugh’ ‘what the hell was that noise’, ‘what the?’ ‘ Tss OW’ ‘blurgh’ ‘cough’ ‘’Throat
bass’’ ‘’lip bass’’ ‘’Hiphop beat, hip hop
scratch, hiphop scratch’ ‘dnb build up’ ‘dnb for 8 bars’ ‘ blurghhh!’ ‘coughcoughcough’ ‘zombie dubstep splutter’ ‘death
rattle’.
This was the dialogue I wrote down for myself and during
the recording I tried to act it out as much as possible. To create the
recording me and a friend used ‘ableton’ music software, to splice the recordings together. I
did the full hiphopscratch dnb build up as one take
to start, then I did the zombie dubstep and spliced that in afterwards. I then went on to do
the dialogue at the start and added the fly buzzing around underneath. When the soundtrack is fully produced I am
going to memorise the entire track and act it out on video as a reference for
my final animation. I think it would be a good idea to get my dialogue test and
acted out video on the same screen and synced up so that I can watch them both
at the same time and on the same screen when I am using them as reference
during the production.
Tuesday, 25 November 2014
Soundtrack

Today I completed the soundtrack for my animation this
was a huge milestone for me. This is now paving the way for me to go on to
write my xsheet and then create a
dialogue test video using photos of the head with the different mouthshapes in place, involving
no moving or acting doing this dialogue test will help me work out any kinks I
may meet along the way and gives me time to go over my xsheet. These two things
will be finished by christmas along with both the
models and all the correct mouthshapes attached to the stage. This allows me to go into full
production as soon as I come back after Christmas using my dialogue test and xsheet as a guide to
complete the animation.
Thursday, 13 November 2014
Frames per Beat

Wednesday, 5 November 2014
Mouth


Friday, 24 October 2014

After long deliberation with tutors I decided upon using 6 different mouth shapes for my head that are attached by the stickiness of the plastercine alone and smoothed over this was a lot easier than creating some kind of shelf locking system protruding from the neck. The mouth shapes all started as matching blocks of plastercine over time I have sculpted them into the shapes of the needed phonetics trying to shed as much weight along the way.

Tuesday, 21 October 2014
Thursday, 16 October 2014
Ammending problems
After making my first few attempts of the puppet and
realizing its strengths and weakness’s I was able to create a new puppet that
was rid of the problems that the first ones encountered these included; being
too small and trying to get all of the mouth shapes out of one plastercine mouth. I also
noticed that by stopping the neck at the shoulders and starting the torso in
another colour wasn’t working as they tended to split apart whilst moving the
neck I will overcome this by making a small layer of skin attached to the neck
all over the torso and then applying the t-shirt and jacket over the top of
that to stop the splitting. I overcame the problem of the splitting the mouth
during talking by researching some of the great stop-motion movies to see how
they overcame this, animators in movies like the nightmare before christmas used a process called replacement
animation which uses an array
of head shapes/mouth shapes for the characters, Jack had over 300 head shapes
throughout the entire film. I decided that this is the way I should go and
proceeded to chop the jaw off my newly made bigger puppet (which you can see in
the video) . The new puppet employed some of the same techniques from the first
with things like the armature being created from two balls of newspaper and
duct tape and slightly thicker wire forming the spine as well as things like
the eyelids for the blinks as these worked well on the first puppets.
Wednesday, 15 October 2014
recycling plastercine

I have recently realized that a wire jaw will not work as I can not express the amount of movement needed to show convincing lip sync. I decided to recycle all of the plastercine used to create my first few models as they are useless.
Monday, 6 October 2014

This is the second model I have created for my animation, this model contains interchangeable eyelids, movable eyes and a wire bendable jaw. It contains an armature made from newspaper and duct tape to form a small skull a wire neck and shoulders this is then screwed down to my set using straps. Here is a small test animation I did using the animation software 'iMotion' on my iPhone.
Wednesday, 1 October 2014
start of animation

This is the first practice model for my new stop motion animation which will portray a head asleep in a strange world made of plastercine. The head will be stung by a beatboxing fly and will be infected then going on to beatbox himself to death. The main part of my animation is the lipsyncing to the beatbox which has never really been touched upon in animation before. I built this model to discover if their are any problems with the materials or approaches to the construction of the model before going into full production of the animation. I will probably have to redo this a few times because during shooting a stop motion animation you have to work in a 'straight forward' manner working from the first frame to the last without mistakes. This is going to take a fair bit of planning and will probably go wrong if I use the first model I create.
I do really like the colour scheme of this model and probably going to be the colours I use in my final animation, but their are huge problems around the mouth. If I where to animate at this scale which is about 3 inches high I would be unable to get believable movement from the mouth as well as the fact that it has no jawbone and moves in a weird way.
Subscribe to:
Posts (Atom)